Hello Friends!! It’s been such a hectic week!! This past week was my first full week back to
school and I don’t know who’s more exhausted!!
Me or the kid’s in my classroom!!
But, schedules are coming together and the kids are adjusting back to
the routine, so life is good! I am also proud to say that my husband and I celebrated 28 years of marriage on Saturday! He is the best man I know and I am so blessed to have spent all these years together!! He is more than I could have ever dreamed of in a husband! Now I just
have to get through my son’s wedding in November and I will be good to go
(ha!)!! The wedding will keep me busy, but I just can't believe my first baby is getting married!! Where did the time go?!?!
 |
| Vintage Flower Tag |
This is my take on a vintage flower tag! It was so much fun and easy to do and I used some of my favorite “stuff”!! So, on that note, let’s make a tag!!
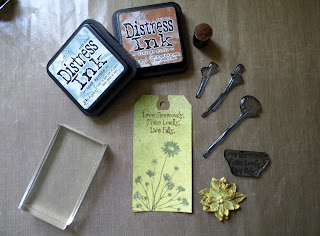
I started out with a standard shipping tag (4-3/4 x 2-3/8). I actually bought some at the office supply store, I got 100 tags for just a couple bucks. On days that I have more time I will cut a bunch out on my cricut as well! There are so many carts with really cute tags! I sprayed the tag with two different glimmer mists. (My favorite "stuff" to play with!) Olive green on the top of the tag and gold on the bottom. (hint: I keep a large pizza box on hand when spraying my glimmer mists! It saves me on having to clean any mess I make) I then gave the tag a quick dry with my heat tool.
I knew I wanted a sentiment on the tag so I pulled out my big book of stamps! (I will have to pull that out for all of you sometime!) I found a nice sentiment and flowers in the Treasured Memories stamp set by CTMH. I used Vintage Photo Distress Ink by Tim Holtz to stamp my sentiment and Iced Spruce Distress Ink for the flowers. I also used my little dauber thingy (lol) to distress a flower I found in my stash.
It took just a few moments for my ink to dry on the tag and on the flower. Then I used my handy dandy quick dry adhesive and glued the flower down onto the tag. I also grabbed my Prima branch bark chalk and chalked the edges of the tag. When I am doing a “vintage look” project, I make sure to let the chalk actually bleed over onto the surface to help me achieve that worn look. I grabbed a 6 in. piece of twine and tied it on the top and there you have it!!


