Sunday, December 29, 2013

Happy Holidays!!

Hello my crafty friends!!  I would like to take an opportunity to wish all of you a very Merry Christmas and Happy New Year!  My household has had a lot of ups and downs this year, but we have made it through and we are looking forward to 2014 being a great year!  My husband lost his job this year and started with a new company that moved him out of state.  He did the best he could, but we just could not maintain two households, so he has moved back home today!  So, let the job hunt begin again!  We've been through tough times before and we can do anything together!  But any prayers would be appreciated!  We also celebrated the marriage of our oldest son Kevin to the love of his life, Katrina!  The ceremony was breath taking and we danced the night away at the reception!  Katrina has graduated college this year, Kevin has graduated college and will start his teaching career in January (the apple didn't fall far from the tree with this kid!)  2014 will once again bring changes for our family!  Kevin and Katrina and their daughter Khloe (often my scrapbooking muse) are looking for their own home and will be moving out after spending 3 years with us.  My youngest son Don will be graduating college in May and will go where the wind blows him!!  Jim and I wish them all the best as they leave our nest and create their own nests!!  (and grandma will get her craft room back ;) )


This is my grandaughter Khloe Marie.  She is the light of my world!  It's hard to believe she will be 3 in the spring!  We had so much fun with her this Christmas!!  Our home was visited by a silly little elf that Khloe named Magic!  Magic played all kinds of silly tricks and hid all over the house!  And Khloe finally understood "Santa" and was so very very excited to leave reindeer food in the front yard and homemade cookies for Santa on Christmas Eve!!  It's been a long time since we've had "Santa" age children in our home!  Next year, they will be celebrating Christmas in their very own home!


Christmas is a tough time of year for me.  It was always my Dad's favorite holiday.  He's been gone 13 years now.  I have always done well in dealing with his passing, but Christmas is always hard for me.  I would have been happy to not even put up a tree, until Khloe was born!  It is still tough for me, but little Miss Khloe is the reason for my season!  Her smile and her joy are helping me to get my Christmas back on!  Thank you Khloe for always putting a smile on Grandma's heart!


So, from my family to yours, Merry Christmas!  I hope you all enjoy what ever holiday your families celebrate!  I wish you all peace and happiness in this coming year.  Thank you for all your love and support you have shown me since starting this blog!  I look forward to a great 2014 with all of you!!  God Bless!!

Leslie

Merry Christmas from the McGrath family


Wednesday, December 11, 2013

Wood Mounted Stamps & Storage

Hello my crafty friends!!  Today it is my pleasure to share over on She’s A Sassy Lady!!  A heartfelt thanks to Sheila for inviting me!!

I can’t believe it’s December already and Christmas is just a few short weeks away!!  For me, that means a TWO WEEK break from school, which mean TWO WEEKS of crafting fun!!  I just love my CTMH stamps, but I have tons of wood mounted stamps that need to be re-organized to take up less space.  

So, that means that this gallon size bag of wood mounted stamps (which is just 1 bag of many lol!) needs to be un-mounted and still remain useable!  This is such a fun and easy project!


First, using Stazon Jet Black ink, I stamped each stamp onto a sheet of sticky backed foam.  (I got this at Michaels for just .89 each).  Be sure to leave space between each stamped image so you can cut them out!

Here is an example of just a few of the wood mounted stamps from my gallon size bag, stamped onto the foam.  As you can as see, I left an ample amount of space around each stamped image.

After stamping onto the foam and cutting them out, I removed the stamps from their wooden blocks.  I then removed the foam from the back of the stamps.  If removing the foam gets difficult, simply put the stamp in the microwave for 20-30 sec. and that should loosen any glue on the back of the stamp, and allowing you to pull the rest of the foam backing off!

I made sure to clean off the back of each stamp with “Un-Du” and carefully scraped off the excess glue with my cricut spatula.  I then wiped them off with a baby wipe.  I just purchased some Goo-Gone to see how that works as “Un-Du” is a bit pricey and can be hard to find.


Now I peeled off the back of the sticky foam and held it up to a light and lined up the actual stamp with the stamped image on the foam.  Once I was confident the images were lined up nicely, I pressed the stamp down firmly to ensure that the stamps were nicely stuck to the foam.  I used scissors and on some stamps I used a hot-knife to trim away any excess foam from the stamp.

And here you have it!!  All those wood mounted stamps hae been removed from their wood blocks and remounted onto foam.  Now, not only are they ready to be used on my stamping blocks, but they take up much less space to store!

Here are the before and after pics!!  Can you believe it!! 


They now fit into a sandwich baggie!!  Once I get all of my wood mounted blocks unmounted and put onto foam, I will put them on laminated sheets for even easier access and storage!!


I hope that this tutorial encourages you to get those stamps out, get them organized in a fashion that saves on space, and gives you easier  access to them!!  You won’t use them if you don’t see them!!  I am hoping to do my very first video tutorial using this technique!  I want to get that accomplished on my two week break!!  Thanks for hanging out with me today!!  Keep on crafting and from my family to yours, have a safe and wonderful holiday season!!


Sunday, November 17, 2013

The Window - Mixed Media Page

Hello my crafty friends!!  I was at a crop on Saturday, and after I finished up a few odds and ends on some projects, I decided to work on a page for my art journal.  The name of my journal is No Rules, No Limits, and it is my creative work in progress!!

We are heading into a cold, grey, dreary season called winter!  So, I thought I would create a page with sunshine on it!  There is no title on this mixed media page, but I like to refer to it as "The Window".  I love to look out my window and see sunshine!  So here it is:


I first primed the page with gesso and then sprayed the page with some sprays from Lindy's Stamp Gang.  I then used some Prima stencils, the crackle one and then one that has really cool windows.  I also found a sunburst stencil for the sunshine!  To create texture with the stencils, I used molding paste, and a prima stamp for the brick.  I also used some acrylic paints on the leaves. (I made my own stencils for the leaves!)  On the window I mixed some perfect pearls into the molding paste.  After drying it, I added some black acrylic paint and then wiped it off for that distressed look.


Here is a close up of the leaves I painted using my own stencils.  There are prima flowers and pataloo flowers tucked in there along with some bling to just add a delicate touch!  I'm not real good at clustering flowers, but I know that with practice i will get better!!


And here you can see the sunshine through my "window"!!  I hope that you enjoy the sunshine through "The Window" and that this creation brings you inspiration!!


I hope that you have a great week!!  Thank you so much for stopping by my little creative part of the world!!  Keep on creating my friends!!

Wednesday, November 13, 2013

Fall Texture Layout

Hello my crafty friends!!  Happy November!!  Today is my turn to share over at She’s A Sassy Lady and here is the project that I shared!!  Thank you Sheila for having me!!  It’s been a crazy, crazy time at my house and I must say, I’m exhausted!!  Last weekend we celebrated the marriage of our son to the love of his life!!  The wedding ceremony was beautiful and the reception was blast!!  I haven’t danced that much in years!!  So any guesses on what I will be scrapbooking for the next year lol!!  I hope to have some photos to share in the next week or so!!

This month I wanted to share a fall layout that experimented with textures.  I am really trying to push myself to think outside the box and push my comfort zone.  Sometimes I succeed and sometimes it’s an epic fail!!  With that being said, I started out by spraying one of the pages with coffee shop glimmer mist to allow it to flow with the 2nd page of the layout.  I then added some molding paste and sprayed it with olive vine and then wiped it off.  That way I got the color with just a little of the glimmer!!  Some other fun textures I added was drywall tape and twine!!

The flowers were cut from the Cricut Art Philosophy cartridge and the leaves were cut from the Cricut A Child’s Year Cartridge.  Both were stamped with a script writing stamp and then painted with crackle glossy accents.  After I photographed the layouts and edited them, I noticed that the flowers were lacking something….  so I added Black Diamond stickles to the center of the flowers!  

The tags were misted with olive vine and gold glimmer mist and stamped with CTMH stamps.  The flower is hand sewn and sprayed as well.  I also added a small wooden clock and key shaped paper clip from Prima.  All the edges have also been distressed and chalked!!


Thank you so much for playing along with me today on my journey into textures!!  I hope that it inspires you to push your comfort zones in your creativity!! 

Monday, October 14, 2013

Mixed Media Page


Hello my crafty friends and happy Monday to all of you!!   So here is my first attempt at a mixed media page for my art journal that I started back in September.  I only have limited supplies with me as i am in Celina, Ohio visiting my husband at his new job, and he would only allow so much in the car!! hahaha!!


Here is a close up of the journaling I found in a DCWV stack!  I really liked it so it was my foundation for the layout!


This is the lower side of the page.


This is a closer look at the top of the page!  I used alot of glimmer mist sprays and dabbed and dried them until I got a look that I liked.  Then I just started to tear paper and found some green sparklers to add to the top and bottom!


I hope that you enjoyed my "masterpiece", it's hard to show how much it shimmers in the picture, but I loved that I just went for it!  It may not be the best, but not bad for a beginner!! haha!!  So I am challenging you to go try something new!  It doesn't matter how it turns out!  Just try!  Have a great evening everybody and keep on crafting!!

Always,

Leslie

Wednesday, October 9, 2013

Love & Happiness

Hello there my crafty friends!!  Today is my turn to share here on She's a Sassy Lady!  Thank you so much Sheila for having me once again!!  This is a page that I put together while at my scrapbooking retreat last weekend!!  We raised over $1200 for a breast cancer organization located here in the Indianapolis area!

So, here is the layout:


The background paper is from my "stash" of paper and the banners and rectangles with circles are oriental trading christmas paper.  The "Love & Happiness" embellishments are from prima and I sprayed them with my glimmer mists!

I promise to share more in-depth pages with you, but I am sorely under the gun, as my son's wedding is in 3 weeks!!  So I am just a wee bit crazy right now!!  I also think that I will play with how to take better pics of my layouts for you!!

I hope you enjoy the layout and that it inspires you to be creative!!  Have a great day my crafty friends!!

Saturday, October 5, 2013

My Cricut Craft Room Blog Hop


Hello my crafty friends!!  Welcome to My Cricut Craft Room's October Blog Hop!!  Collectively the design team and guest designers have made some amazing and special projects to share with you... over 60 projects are on this hop, but it is in less than 20 stops..    You should have started at http://mycricutcraftroom.blogspot.com  if not, please start at the beginning!! 

I am super excited to be a guest designer on this blog hop that is helping to relaunch Erica's blog!!  I have two projects to share with you today!!  So scroll on down and take a look!!

This first two page layout is entitled "Bathtime"  I know we all have some cute pictures of little one's taking a bath and the New Arrival cartridge has the perfect cuts for this!!  Don't you just love that little baby in the bathtub!!  She is from the Paper Dolls for Everyday cart!!  I also used an EK boarder punch!!  And some ducks and water spots from my un-ending stash of baby embellishments!!


Now this layout is one that I have been working very hard on.  It is a vintage "Generations" layout.  It is still a work in progress.  I think I am done with it, and then when I look at it, I add more to it!!  Lol!!  But, we are preserving memories here, and the photo of my grandaughter holding my mother's finger is priceless to me.  As well as the photo of all four generations.  The Heritage cart is the perfect cart for this type of layout!!  I love the font from the Blackletter cart and the Art Philosophy cart made the perfect tag!!


Thanks so much for stopping by and visiting my crafty space!!  Please make sure to follow me and by all means leave a comment!  I love hearing from you!!  I hope that I have inspired you to do something creative today!!

Your next stop is on the blog hop is Roberta Swisher and here is the link:

http://queenbeepapercrafts.blogspot.com

If you should get lost along the way, here is the entire line up:

5. Liliana Umpierre - http://www.likidesigns.com/blog
6. Leslie Wrege McGrath - http://scrapnlifeaway.blogspot.com/
9. Brenda Knapik -  http://www.disneygirlcrafts.com/
11. Vicki Glenn - http://www.vickiscraftroom.blogspot.com/     
20. Crafting Blog Events http://craftingblogevents.blogspot.com


Sunday, September 22, 2013

Art Journal Cover

Well hello there my crafty friends!!  I have been wanting to create for a very long time an art journal.  Just by looking at our scrapbook albums, we can see how far we have progressed.  Have you been there??  Compare your first album to one you have just completed or are currently working on.  For me, the growth and changes has been incredible!!

Well, i've discovered that telling our stories is not always just about all the pretty paper.  Now don't get me wrong, I eat, sleep and breath scrapbooking, and I always will.  I have just discovered another step in the creative process that I want to succeed at.  It's called mixed media, and I want to document where I am today and where will my creativity take me on my journey into this fantastic world of creativity!  Remember, attempting to be creative is my escape from this crazy world we live in and my crazy day to day life.

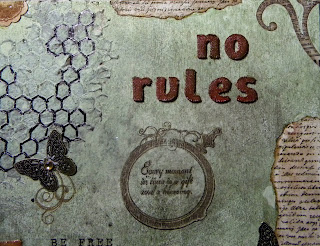
I have been adding little bits of mixed media into my scrapbook pages here and there, but this is my very first strictly mixed media creation!!  it is the cover of my journal.  Notice the title, no rules, no limits!!

It was so freeing to me to just create, that there is no right or wrong!!  there truly are no rules and no limits to what you can create!!

I am truly excited to be sharing more of my mixed media are with you through this blog.  But as i said before, i will never stop sharing with you all my scrapbook pages, cards and tags!!  It's all part of the process  of creativity for me!


Here are a few close up shots of the front page of my art journal:

top right corner of journal cover
bottom left corner of journal cover

Thank you so much for stopping by my little creative part of the world!!  Please feel free to leave me a comment below in the comment box!  I would love to hear what you think!!  Have a great week everybody!!  Now, go forth and create!!

Wednesday, September 11, 2013

Fall Layout Sneak Peak!!

It’s hard to believe that it is already September, although the temperature outside does not reflect it!! Today is my day to share a creation over at http://shesasassylady.blogspot.com/ !  This is the post that I shared!!

The layout that I am sharing today is kind of a sneak peak!  I am teaching a class in October at a retreat that will raise money for breast cancer!  I will be teaching 2 double page layouts, which have a fall theme, and this is one of the double page layouts!!  I had some pictures from my grandaughter’s first Halloween (she’s 2 now) and they were just perfect for this!!


The paper is from the Farmhouse fall collection.  The pumpkins and vines are from the Happily Ever After cart.  The leaves are from A Child’s Year cart.  The metal Hope embellishment is from Tim Holtz.  The twine and doiley are from my ever growing stash!!

All the paper strips have been distressed and chalked to provide that distressed feel.  The pumpkins have been stamped with a texture stamp I borrowed.  The leaves have been sprayed with olive vine glimmer mist and then chalked with a Mango Mai Tai powder puff.

And, what’s a layout without a few tags!  I just had to add a tag with some cornstalks, the stamp is from CTMH Abundance Holiday collection and of course it has been sprayed and distressed!  The journaling was cut at ¾ in. from the Plantin cart using the roly poly feature, and then I outlined the letters (just in random spots on the letters) with an orange colored pencil!  The smaller tags were also sprayed with olive vine and then stamped with the same stamp that I used on the pumpkins!  Then the finishing touch, I lightly painted all the pumpkins, leaves, small tags and letters with crackle accents!!


I hope that you enjoy this layout and that it inspires you to create a beautiful fall layout of your own!!  If you like what you see, please be sure to leave me a message below! I love to hear from all my crafty friends out there!!  And by all means, feel free to follow me by just signing up!!  Have a great day everybody!!

Wednesday, August 14, 2013

Vintage Flower Tag

Hello Friends!!  It’s been such a hectic week!!  This past week was my first full week back to school and I don’t know who’s more exhausted!!  Me or the kid’s in my classroom!!  But, schedules are coming together and the kids are adjusting back to the routine, so life is good!  I am also proud to say that my husband and I celebrated 28 years of marriage on Saturday!  He is the best man I know and I am so blessed to have spent all these years together!!  He is more than I could have ever dreamed of in a husband! Now I just have to get through my son’s wedding in November and I will be good to go (ha!)!!  The wedding will keep me busy, but I just can't believe my first baby is getting married!!  Where did the time go?!?!

Today was my day to share over at http://shesasassylady.blogspot.com/ and I created a vintage flower tag!! You know I just had to break out the Glimmer Mist sprays!!  So here is my tutorial, I hope you enjoy it!!

Vintage Flower Tag

This is my take on a vintage flower tag!  It was so much fun and easy to do and I used some of my favorite “stuff”!!  So, on that note, let’s make a tag!!


I started out with a standard shipping tag (4-3/4 x 2-3/8).  I actually bought some at the office supply store, I got 100 tags for just a couple bucks.  On days that I have more time I will cut a bunch out on my cricut as well!  There are so many carts with really cute tags!  I sprayed the tag with two different glimmer mists. (My favorite "stuff" to play with!)  Olive green on the top of the tag and gold on the bottom.  (hint:  I keep a large pizza box on hand when spraying my glimmer mists!  It saves me on having to clean any mess I make)  I then gave the tag a quick dry with my heat tool.


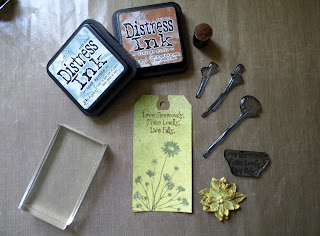
I knew I wanted a sentiment on the tag so I pulled out my big book of stamps! (I will have to pull that out for all of you sometime!)  I found a nice sentiment and flowers in the Treasured Memories stamp set by CTMH.  I used Vintage  Photo Distress Ink by Tim Holtz to stamp my sentiment and Iced Spruce Distress Ink for the flowers.  I also used my little dauber thingy (lol) to distress a flower I found in my stash.

It took just a few moments for my ink to dry on the tag and on the flower.  Then I used my handy dandy quick dry adhesive and glued the flower down onto the tag.  I also grabbed my Prima branch bark chalk and chalked the edges of the tag.  When I am doing a “vintage look” project, I make sure to let the chalk actually bleed over onto the surface to help me achieve that worn look.  I grabbed a 6 in. piece of twine and tied it on the top and there you have it!!


You can do so many things with tags!  They are great for journaling, but I think a tag like this would look so pretty on a bouquet of dried flowers or used as an embellishment on a vintage layout!!  I hope that my little creation encourages you to create some of your own tags!!  Have a great day everybody!!  Go forth and create!!!

Tuesday, July 30, 2013

Hand Made, Hand Painted Card


Come Craft With Me!!
Hello my creative friends!!  I am sorry I haven’t posted in a few weeks, life for me has been rather crazy!  I went to spend some much needed time with my sister and nieces out at my Mom’s house in Ohio.  Then my Mom and I flew out to Florida for a week!  I am so excited for her as she purchased her winter home paradise while we were down there (and an awesome red golf cart lol)!!  So, now I think I know where my spring break destination is going to be hehe!!


I am THRILLED to announce that TODAY my very first tutorial post was published over at http://shesasassylady.blogspot.com/ !!  Her blog is wonderful, so please stop by and visit!  Here is the tutorial I shared over at Sassy Lady!  I hope you enjoy it as much as I enjoyed creating it!!

Hand Made, Hand Painted Card Tutorial

Hi!!  I’m Leslie from http://scrapnlifeaway.blogspot.com/ !  I am brand new to blogging, but I have been a die-hard scrapbooker  for about 6 years now!  This is my very first post here at She’s A Sassy Lady!  Thank you to Sheila for giving me the opportunity to be part of your Design Team family!!  I hope that I can encourage others to be creative!  I am not gonna lie, I’m rather nervous, but onward and upward!!  Let’s make a card!!


I started out with a basic 8 ½  x 11 piece of ivory card stock and cut it in half to create my 5 ½  x 4 ¼  card base.  I then cut one 5 ½  x 4 ¼  patterned paper from my DCWV Stack 7 pad.  Chalk the edges of the patterned paper with my Prima Branch Bark chalk.  Then adhere it to the front of the ivory base.  Cut two 5 x 3 ¾  mats using dark tan paper from my DCWV Mariposa Stack.  I trimmed the bottom of each mat using one of my EK punches.


Using my VersaMark watermark stamp pad, I randomly stamped three different flowers (from Scrappy Cat) on the mat that will go on the front of the card.  I stamped my “thank you” sentiment from the CTMH Casual Expressions stamp set in the lower corner of the mat.  I then covered my stamped images with Rangers Copper embossing powder and then hit them with my heat gun.  I also stamped and embossed a flower on the mat that will go inside my card.


I wanted to add color to my flowers, but I don’t own any Copic Markers, and I didn’t like the look when I tried my water color pencils.  BUT, I do own some Perfect Pearls by Ranger!!  I used Blush, Forever Violet, Blue Smoke and Forever Green.  Using a paint brush with a very thin tip, I painted each flower.  I allowed about ½ an hour for my painted mats to dry.


After my flowers were dry, I chalked the edges of the mats with my branch bark chalk.  On the mat that goes inside the card, I stuck a ½ in. strip of the patterned paper on to the top of the mat.  I thought it would add some nice contrast and tie it into the front of the card.  After looking at the mats, I decided they still needed a little “something”, so I glued some small gems onto the centers of the purple flowers.


And here it is!!  A hand made, hand painted card!!  You can make this card so versatile by simply switching out the sentiment!!  I hope that you enjoyed my very first tutorial!  Please feel free to stop by my blog!  I am starting on a wonderfully creative journey and I would love for you to follow along!  Who knows where we will end up!  A huge thank you to Sheila for having me visit today!  I’ve had a creative blast!

Always,

Leslie

Friday, July 12, 2013

Christmas Traditions - Christmas in July, Part 2

Our family has always had traditions, such as watching It's A Wonderful Life during the Christmas season.  When new people become part of your family, they bring with them the traditions they shared with their families.  As is the case when Katrina became part of our family!  One of those traditions being, that the kids get to open one gift on Christmas Eve (always their Christmas pjs!!)  So, this past Christmas Miss Khloe got to open her Christmas Eve gift!!  She was so tired, but just looked so darn cute!!


I am quite sure I could have added some bling, but it looked just right to me as is.  And that's ok!!  Some days I like to really load up on the embellishments, Prima being my favorite!  But this layout is about a simple time in Miss Khloe's life!!  Lord knows it will be much less simple as she gets older (as Jim and I laugh to ourselves, the kids are gonna have their hands full with this little one when those teenage years approach!!)

It is my hope that this layout inspires you to create and preserve your memories of your family traditions.  So that one day, your family can look back and say "remember when"!!

I would love to hear from you!! Please make sure to leave me a comment and I would love for you to follow my blog!! Thanks for stopping by and have a great day!!

Always,

Leslie

Monday, July 8, 2013

Made In America (a few days late) !!

Hello Friends!!  Sorry that I haven't posted in about a week.  I went out to Ohio to visit my sister, two neices and mom out in Ohio and just got back yesterday!  (the internet connection out there was not very good)  It was a much needed break and I have to say that we laughed the whole time we were all together.  Nothing better than girl time with your sister, I will post some pics of our weekend later in the week!

Because I was in Ohio, I missed the 4th of July celebrations with my family back here in Indiana.  So, I didn't get any pics of my Khloe girl on the holiday, but I do have my layout from her very first 4th of July,  which brings me to the lesson of this post.  I love to create layouts with textures and bling and just making them pop.  But, it's also ok to not always have all the "extras".  It has taken me a long time to realize it's not always what you put on your layouts, but the story you tell with them.  So, here is the layout that I did of Miss Khloe's very first 4th of July!


I'm really loving learning how to play with mixed media stuff and adding texture to my layouts, but it's nice to go back to the basics, to remember to tell the story!  The handsome young man is my son, who is Khloe's very proud daddy!  It was such a fun day for them, remembering their baby girl's very first 4th of July!

I hope that your holiday was filled with what makes you happy!!

I really love hearing from you!! Please make sure to leave me a comment and follow my journey on my blog!  Thanks for stopping by and have a great day!!

Always,

Leslie

Monday, July 1, 2013

Christmas In July

I just love love love this layout!!  A family tradition of ours is to watch It's A Wonderful Life during the Christmas Season!  Well, without realizing it, when I took a picture of our tree, I also caught a picture of George Bailey!!  Which will now permanently remind me, whenever I look at this layout, that it truly is a wonderful life!


I would love to hear from you!! Just leave a comment below and don't forget to follow me!!  I have so much more to share!!  You won't want to miss a thing!!  Thanks for stopping by and have a great day!!

Always,

Leslie

Tuesday, June 25, 2013

They Called It A Blizzard!!

This past Christmas was so much fun with Khloe!  This was the first Christmas that she "kinda" knew what was going on. Well, she knew something fun was going on!  Anyway, we live in Indiana and are transplants from Cleveland!  In Cleveland we know what snow is and we know what a blizzard is (oh how I remember the blizzard of 78!!).  So, the day after Christmas, we had a "blizzard" here in Indianapolis.  This was Khloe's first real taste of snow.  The year before we had a whopping 8"!  Not much snow for a little girl to play in!  So I have scrapped Khloe's first time playing in the snow!  Hope you enjoy this double two page layout!!


The paper I used is from Bo Bunny, and the snowflake is from a cricut cartridge I borrowed from a friend and I can't remember the name of it!  I promise to write more information down about my layouts!  But I do have to say, I really really loved this Bo Bunny paper!!  I hope that these snow layouts inspire you to create pages about snow and how much fun it is!  It is amazing to me to watch the wonder in her eyes!  It's like seeing things for the first time all over again!!

This little angel keeps me young at heart, even when my body feels older than dirt lol !!!  Hope you enjoy them!!

I would love to hear from you!! Just leave a comment on my blog below!! Thanks for stopping by and have a great day!!

Always,

Leslie

Monday, June 24, 2013

Prima Sneak Peak on Tuesday!!

On Live with Prima tomorrow:
Sneak Peek of Anna Dabroska's (Finnabair) new Prima collection!

See the class here: http://www.ustream.tv/channel/primaflower

Vintage Vanity Collection with Anna Dabrowska
Tuesday, June 25th at 11:00am PT/ 2:00pm ET/ 6:00pm GMT/ 7:00pm UK, Ire

Join Anna Dabrowska to see her fabulous new Vintage Vanity collection for Prima! This collection boasts a soft and beautiful color palette on a neutral background that will be perfect for mixed media projects, layouts and more! Plus, you will get to see some of the gorgeous new embellishments that come with this line too!

Exciting News

Hi Everybody!  I hope that you have had a nice weekend!!  I had the opportunity to attend a two day crop out at my favorite local scrapbook store!  We had so much fun!  On Friday, I received an email from She's A Sassy Lady.  I've followed her blog since at least 2010!!  I am thrilled to announce that She's a Sassy Lady has asked me to be part of her design team!!  I am beyond excited!!  I will be posting on her blog once a month, with my first post being  on July 30th!!  Needless to say, my mind is spinning with ideas!!  Thank you to Sheila at She's a Sassy Lady for such a wonderful opportunity!!

So here we go!!  I'm jumping in with both feet and not looking back!  I'm on my way to share and inspire others to be creative!!  Whether it's traditional scrapbooking, digitial scrapbooking, card making or stamping, we are on our way!  I also think that it will be fun to jump into some mixed media as well!!

I hope that you will join me on this journey and share with us your creations!!  I am looking forward to see what this blog has inspired you to do!!

I would love to hear from you!! Just leave a comment below!! Thanks for stopping by and have a great day!!

Always,

Leslie

ps - I will have some cute cute cute layouts to share with you this week!!

Wednesday, June 19, 2013

Yup, I'm the Grandma!

First off, happy hump day!!  I have always wanted to do a layout of my own with 5x7 sepia prints!  One of my best friends does photography on the side, and she has now become Khloe's personal photographer lol!!  So, one day last fall, Barbie and I stole Khloe away for a surprise photo shoot!  I asked her if she would take one of me with Khloe.  I'm usually the one taking photos around the house, so I don't have many of myself with her (thinking to myself that I need to change that!).

This two page "Grandma" layout is designed from a BUNCH of layouts I've looked at.  That's the nice thing about this "hobby", you can take inspiration from here and there and make something your own.


So here it is!!  The flowers are from Prima, they key and bingo card are from Tim Holtz, the "grandma" is from the cricut heritage cart and the center doily and hearts are from the Close To My Heart Artiste cart.  I can't remember where the flourishes came from and the ribbon is from my stash!!  Oh, and the paper on the bottom of the layout was sprayed with leather glimmer mist to age it!

I would love to hear from you!! Just leave a comment below!! Thanks for stopping by and have a great day!!

Always,

Leslie

ps - if you notice things coming and going off my blog, don't be concerned!!  I am in the process of "redecorating" and fine tuning!!  Enjoy!!

Sunday, June 16, 2013

Khloe gets her big girl bed!

My grandaughter (and her mommy and daddy) live with my husband and myself.  Well Miss Khloe is just the light of my life and this little one is becoming not so little anymore!  She was two in April and her mommy and daddy have decided that  it's time for her to move into her big girl bed.  Khloe is just in love with Doc McStuffins, so her bed sheets, of course, are Doc!  AND her mommy even got her  special Doc pj's just for her first night in her new bed!  They tried to put her into her big girl bed for the first time at nap time!


Here is a picture of  her mommy putting her down for her first nap in her big girl Doc bed!  Needless to say, she didn't stay in her bed, she pulled a chair over and turned on her light and then sat down in her bed to read one of the MANY books she decided to pull onto her bed!  No nap for a two year old is usually a recipe for a very tough rest of the day.  But Miss Khloe did great with the rest of our afternoon activities.  "Namma" (which is how she refers to me) was so proud of how well behaved she was, while only sleeping 20 minutes in the car!!  She was really quite the trouper even when we stopped to have dinner with the rest of the family!  Needless to say, this grandma worked very hard to keep her awake on the ride home (success!!) and her mommy and daddy promptly got her in her special Doc jammies and it was off to try again to lay her down in her big girl bed!  She only got up a few times and after her mommy read her a quick story, she was out!  And I mean out cold!!  Here is a photo I took of my little angel, sleeping soundly in her big girl bed!!

sleeping like a baby!!

Now let's just hope she sleeps through the night!!  Thanks for reading if you've made it this far!!  This is just a little glimpse of the little girl, who is the joy of my life, and is the subject of many of my scrapbook pages!  I have some really cool pages I will be sharing with you in the coming days!

Time for this grandma to get some sleep!

Always,

Leslie